
Off Site Encrypted Backups using Rsync and AES
Last Updated: Fri, Apr 24, 2009Why?
Well, it is always a good idea to keep backup copies of data. Anyone that has ever used a floppy disk knows that data can disappear unexpectantly. Hard drives are susceptible to data corruption and loss as well. If you don’t have good backups it is only a matter of time until loss occurs.
But is backing up to another hard drive good enough? NO! This month an entire block in my home town caught fire. What your laptop and it gets stolen? Hurricane/flood damage?
How about backing up with a paid service or Amazon S3? Well there are paid services out there that you can backup to that are fairly cheap. One that comes to mind is mozy. The problem is they use a special backup program and don’t support Linux. Amazon S3 seems a bit on the expensive side for large amounts of data storage for simple backups, but definitely worth it if you can afford it.
In this article I am going to show you how to leverage an existing FTP server or a friends computer to do daily encrypted incremental backups.
Requirements
Encryption - I trust my friend, but I don’t trust what other people do on his/her computer. My data needs to stay MY data.
Rsync - Since data will be traveling across the Internet I need to minimize bandwidth usage by doing smart incremental syncing.
Jailed container - Since I am going to be swaping my data for a friends. I need to limit my friend to be able to read/write only to his location and nowhere else.
Disk space quota - I can’t have my friend mess up rsync and accidentally fill my hard drive!
Completely automated - I don’t want to think about it, I just want my data securely transfered weekly
Rsync + Encryption
Rsync by default only syncs data that has changed.. The way rsync limits bandwidth usage is by transferring only the absolutely necessary bits of data. The “problem” with encryption is that it by its very nature changes almost EVERY bit in a file when even a small change is made as it is trying to randomize the data. This basically defeats the whole purpose of rsync causing massive amounts of bandwidth to be exchanged each time changes are made.
With encryption the smallest file change can alter all the other bits in a file. There were a few options to overcome the encryption syncing problem. The first one I tried was to mount an SSH connection with sshfs and then use encfs to make an encrypted folder on the remote machine. This turned out to work alright but had a few bugs and permission issues. The main problem however was jailing someone in SSH. It is a tedious process and sshfs/encfs doesn’t handle interruptions very well. I even tried curlftpfs/encfs as an alternative.
Another option was to use a program called duplicity that would upload via ftp, ssh, scp, rsync, WebDAV, or even S3. This was the perfect solution. The reason I ended up going with this method is because of the ability to use FTP. This allows me to Jail my friend to his own directory much easier.
Setting it all up
Setting up an FTP server
We will want to have some sort of server setup on the remote machine waiting to accept files. For the reasons stated above and the ease of jailing we are going to use an FTP server called vsftpd. On Ubuntu/Debian machines you can install this by clicking this link. Or use the following command:
sudo apt-get install vsftpd
You can have your friend install this on his computer in the same way. Or, if you are just going to backup to an existing FTP server you can go ahead and skip this step.
You will then want to edit the config file of the FTP server:
sudo vim /etc/vsftpd.conf
Change:
anonymous_enable=NO
uncomment local_enable=YES
uncomment write_enable=YES
uncomment ftpd_banner=Welcome to blah FTP service (this will hide the version number just incase)
uncomment chroot_local_user=YES
Once the changes are made save the file and restart the FTP server with:
sudo /etc/init.d/vsftpd restart
Install and Configure vsftpd
Go ahead and test logging into the FTP with your current username. If it works we can proceed to setting up disk quotas.
Adding a User
vsftpd makes things simple by using user logins that are already in place. This means if the person has a Linux username on your computer they will be allowed to login through vsftpd. To add a Linux user you can use this command:
sudo useradd
At this point they have their own login. If you have an SSH server or physical access they can login to your system and execute commands at the user privilege level.
As a backup only user I don’t want this user to be able to do any of those things.
The first thing I am going to do is disable SSH access (if you have an ssh server):
sudo vim /etc/ssh/sshd_config
and add, “AllowUsers backupusername” This will DENY all other users but backupusername.
For added security it is also good go disable the user’s shell in case the backup user ever does gain ssh access. You can do this by executing:
usermod -s /bin/false backupusername
Change user’s home dir to the backup hard drive.
sudo usermod -d /media/drobo/.backupusername/ backupusername
Setting a Disk Quota
I don’t want my friend/backupuser to accidentally fill up my hard drive or use more than our predetermined amount. For this reason we implement disk quotas.
The first thing we will need to do to enable disk quotas is download a quota manager:
sudo apt-get install quota
After that is installed we need to edit fstab and enable quotas on the backup drive. We will be adding the usrquota,grpquota options.

After that is in place go ahead and restart your computer. The quota program will be issued on boot and will go through the hard drive and check the current user usage data.
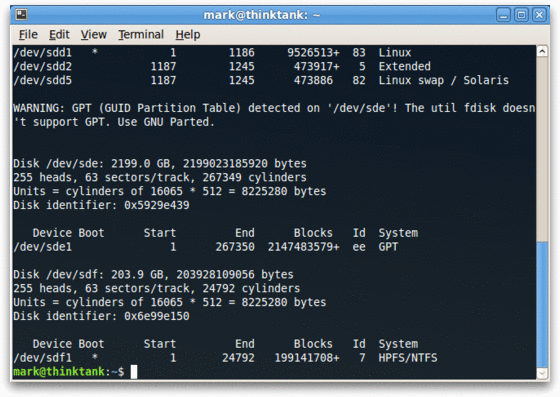
To change the quota limits you can use the edquota command. Replace sdf1 with the quoted drive. You can find this in fstab or by issuing sudo fdisk -l.
sudo edquota backupuser /dev/sdf1
In this file you will have:
blocks, soft, hard
inodes, soft, hard
The blocks section represent the disk space alloted in KB. The inodes section represent the number of files that are allowed.
A zero (0) in any of these columns will mean no limit!
Hard vs Soft Limits
Once the Soft limit is reached it will email the user and alert him/her to remove files within grace period (default 7 days). The hard limit, once reached, will completely cut off all write operations for that user.
In this situation I alloted the backupuser 100gb and unlimited file creation.
Backing it up!
Download Duplicity
Debian Ubuntu/users can click here to install duplicity or use this command:
sudo apt-get install duplicity
Once duplicity is installed we can sync a folder by issuing this command:
FTP_PASSWORD=password duplicity -v 9 /home/mark/yourpath/ ftp://user@host/remote/path
Replacing password with your actual FTP password.
Automating with Cron
One of the requirements for this project is to be able to backup without user intervention. If a backup solution isn’t automated it isn’t a backup solution.
Start by creating a bash script with your favorite text editor:
vim backup.sh
The first line should be: #!/bin/bash
Then add the duplicity line like the one above for each directory you want to back up. Note: Subdirectories will be included you don’t need a separate line for them. You will also have to specify the passphrase for your encryption. Don’t worry this wont be transmitted. If you want to do this wihout the passphrase you can setup a GPG key with the ‘–encrypt-key’ option.
It should look something like:
FTP_PASSWORD=password PASSPHRASE=mysecret duplicity /home/username ftp://user@host/Home
Then you will want to make the shell script executable by doing:
chmod +x
Then open up cron with:
crontab -e
and set the job with something like this:
- 3 * * * /home/username/script.sh
This would automatically run our script every night at 3am
Restoring
To restore just reverse the source and destination, duplicity is smart enough to realize this and start the restore process.
Bonus
Drobo/RAID
You should also keep redundant copies of data with a hardware device. Drobo is a configuration free way to do this but it is a bit pricey. The other option is to build a RAID array of hard drives. The downside to this is that you will have to purchase identical hard drives to make it worth it.
Viewing Quota Logs
To quickly get a report on how much bandwidth is being used by all of your backup users you can use this command:
sudo repquota -as
To turn quota off you can use, ‘quota -q’, to turn it back on, ‘quota’.
Testing Quotas
Create a file of any size instantly. just change the count to the size of file you want in KB.
dd if=/dev/zero of=9mb-file bs=1024 count=9216
Check the size of the file you created
du 9mb-file
sudo usermod -d /media/drobo/.jaderobbins/ jaderobbins