Finding Files in Linux
Last Updated: Mon, May 11, 2009Finding files is one of the first things I see new Linux users struggle with on the command line. Users coming from a Windows background are not introduced to command line style search tools as they are used to point and click search forms. There are GUI search programs in Linux as well; however, it is worth learning the command line tools as they can be linked with other programs to save you tremendous amounts of time.
For example, lets say you want to find all rename and resize all .png files in a directory and all subdirectories while ignoring jpgs. This is something you can do with the command line search tools. Programmers might use find in conjunction with grep to find all python modules that contain a specific import module.
find . -name “*.py” -exec grep -n -H -E “^(import|from) math” {} \;
If the above command scares you don’t worry, there are also very good GUI search programs available for Linux.
Meet the Tools
locate/slocate
Depending on the distribution you should have a either locate or slocate installed. Locate is pretty straight forward. Once a day (cron.daily) locate runs a program called updatedb that goes through files and indexes them in a database. This is similar to what Google does on the web. It finds files and remembers them for later.
To use locate all you have to do is type in locate and the search term.
locate mysearch
If you are curious the database for slocate can usually be found at: /var/lib/mlocate/mlocate.db
If you want to update the index you can do:
sudo updatedb
find
The find command is what I would call a powerhouse program.
The biggest difference between slocate and find is that find will actually look for current files in real time based on the criteria where slocate relies on its indexed files stored in the database to find files. This means if the file was created recently find will be the correct tool to use. It is also worth noting that slocate does not index temp folders.
Although find is arguably much more powerful, locate is much faster as it indexes and stores files in a database instead of traversing through each directory.
Basic usage syntax is:
find [starting path] [qualification]
which
The which command is pretty simple. It shows you the full path of shell commands.
whereis
Whereis is the same as which but it returns the path to the source and the man page.
Google Desktop
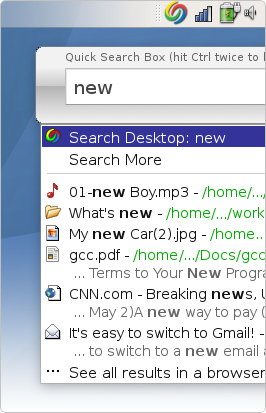
 The Google Desktop Search is basically a gui version of locate
It has a built in webserver to display search results which has the option to open the file or folder. It can also do pretty much anything Google’s web search does including indexing PDFs and Word documents.
The Google Desktop program also comes with a shortcut so you can start searching easily.
Another cool feature is it actually will keep caches of files so you can use it as a mini version control system to keep track of previous revisions or restore deleted files.
Gnome Search Tool
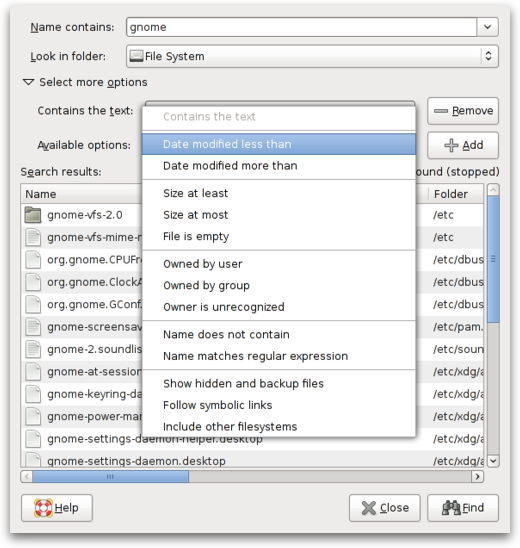
The Gnome Search Tool is basically a GUI version of locate and find. By default, when performing a basic search it first uses the locate command, and then uses the slower but more thorough find command.
You can find the Gnome Search Tool by going to Places > Search For Files

The Usage
GUI search applications like Google Desktop Search and Gnome Search Tool are pretty self explanatory so we are going to focus on the command line tools for this section and give you examples of some useful commands.
locate/slocate
Misplaced your css file?
locate style.css | less
Not sure if it was Style.css or style.css? The ‘-i’ flag will search case insensitive.
locate -i style.css
Locate all hidden files
locate /.
If you pass the ‘-r’ flag to locate you can search using regular expressions.
find
find [starting point] [search criteria] [action]
So the basic usage would be:
find . -name “*.jpg”
_Explination: find is the command, the dot ‘.’ means start from the current directory, and the -name “*.jpg” tells find to search for files with .jpg in the name. The ***** is a wild card. _
Find all css files in the ‘/var/www’ directory.
find /var/www -name “*.css” -print
Find all files that are writable. This is handy when securing directories down.
find . -writable
Find Files by Size
Find all ‘.txt’ files that are less than 100kb in size.
find . -name *.txt -size -100k -ls
Find Files over a GB in size
find ~/Movies -size +1024M
Find all files that are over 40kb in size.
find . -size +40k -ls
Find Files by Time
Find all files in ‘/etc’ that have changed in the last 24 hours.
find /etc -mtime -1
Find Files by Owner
find . -user mark
The power comes when you want to apply an action with the search. This command will find all css files and then remove them.
find . -name “*.css”-exec rm -rf {} \;
It is worth noting that find is recursive so be very careful when using the ‘-exec’ flag. You could accidentally delete all css files in your computer if you are in the wrong directory. It is always a good idea to run find by itself before adding the -exec flag.
which
This command is useful for finding out “which” binary the system would execute if you were to type the command out. Since some programs have multiple versions installed the which command comes in handy to tell you which version it is using and where it is located.
which perl /usr/bin/perl
whereis
The whereis command does the same thing as which but it will also return the path to source and corresponding man page.
whereis perl perl: /usr/bin/perl /usr/share/man/man1/perl.1perl.gz
